I was just reminiscing on my nights of haunting, remembering the times when the edible blood would make its rounds to bloody people up before the show. During those times, I was part of the vampire group of the haunt; so naturally, our group gravitated to the edible blood and playfully drizzled it in and around our mouths partly to get into character but also because it tasted really good. This memory sparked an idea that I'd like to share for all the current haunters because it really did help us get the feel of being a vampire who enjoys devouring the sweet nectar of the vein.
All haunters need snacks, right? Energy and enthusiasm can get a bit sparse a few hours in, and having an in-character snack nearby would really help keep that energy focused and bright. My idea is to get to know your character intimately enough to know what creepy thing they enjoy ingesting, as every creature of the night must feed its gut, and it's usually with something that terrifies and captivates. Werewolves, for example, could bring jerky or steak tips to be gnawing on. Vampires could bring cherries, strawberries, or their respective syrups. Mental patients could bring tictacs, so it feels like they're "taking their meds", even though the meds don't work--they're too crazy!
This is a fun idea because it not only involves eating, it also encourages creative freedom from one actor to another. It's a good way to stay active, awake, and nourished while doing what we do best, which is scare the piss out of the customer.
So, who's your character, and what creepy item might they be snacking on to incite fear?

Thursday, June 29, 2017

Wednesday, February 10, 2016
DIYTuesday: Spooky, Sneaky Air Neutralizers
Hello, Friends!
Tonight's DIY was a little impromptu because I recently started collecting toilet paper rolls for another, larger project, but found that I needed some instant gratification within this crafting vein before moving on.
Introducing my little invention: the Spooky, Sneaky Air Neutralizer!

With most of my windows temporarily sealed for the cold months, my apartment can get a little funky, at times. The kitchen also seems to hold a bit more humidity than any other kitchen I've used, as my produce tends to rot faster. TMI, I know, it's horrible stuff; but this is why I need these Spooky, Sneaky Air Neutralizers!


"GAAH, NO! FOR THE LOVE OF GOD, HAVE MERCAAAYYYYYYY"


Tonight's DIY was a little impromptu because I recently started collecting toilet paper rolls for another, larger project, but found that I needed some instant gratification within this crafting vein before moving on.
Introducing my little invention: the Spooky, Sneaky Air Neutralizer!

With most of my windows temporarily sealed for the cold months, my apartment can get a little funky, at times. The kitchen also seems to hold a bit more humidity than any other kitchen I've used, as my produce tends to rot faster. TMI, I know, it's horrible stuff; but this is why I need these Spooky, Sneaky Air Neutralizers!

I've got a good stock pile of these, now; so pulling 3 for a mini project was no big deal. Here they are, posing for the camera, completely innocent to the slaughter that awaits them...

"GAAH, NO! FOR THE LOVE OF GOD, HAVE MERCAAAYYYYYYY"

In order to fill them with baking soda, I needed to make bottoms for these guys. Keeping it simple, I grabbed some old drawing paper and my compass.
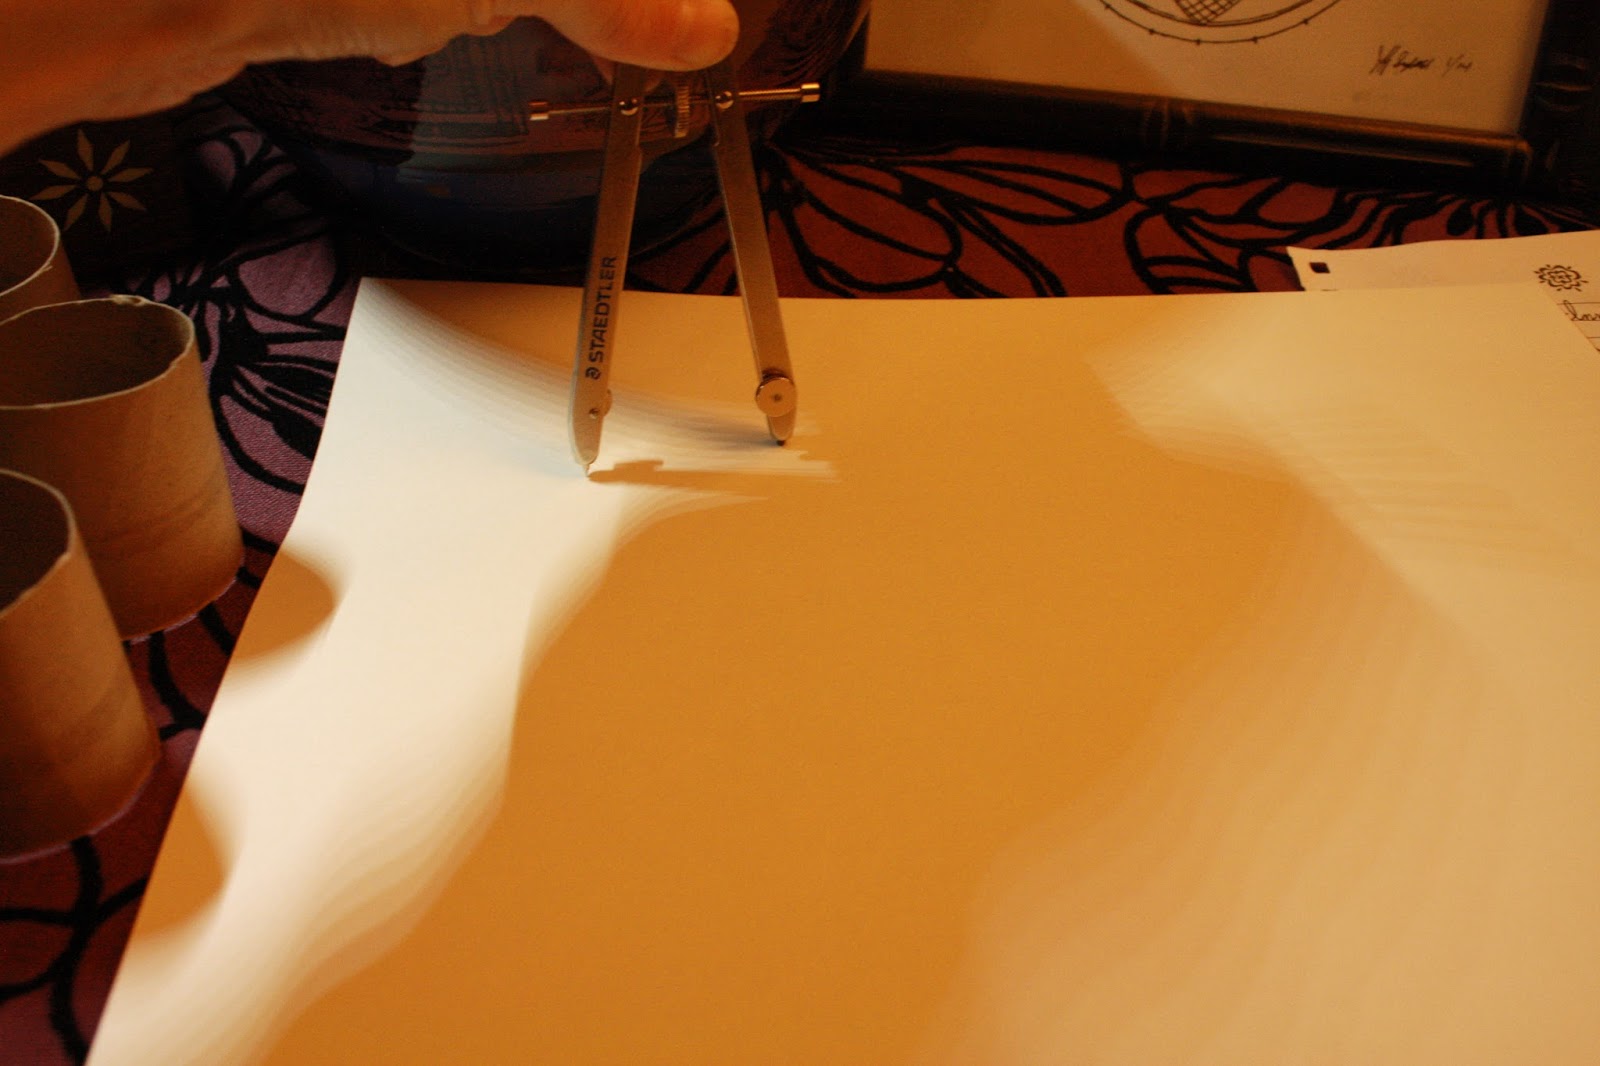
I found the diameter of the most round toilet paper roll I had and marked that length on the paper, before eyeballing the center and using that new length to draw out the bottoms.

Pre-merge. They look nervous.

Once I had the bottoms cut out and ready for action, I grabbed some packaging tape and wrapped it, sticky side in, around one end of each TP roll. This tape will be used to hold and seal the bottom of these little dishes, so be sure to give yourself plenty to work with.

I cut tabs in the tape to make folding inward easier. After shimmying the paper bottom into place (around a lot of swearing--those bastards were stubborn because I made them a little too big), I gently but firmly folded each tab of tape onto the bottom.

They aren't the best bottoms, but they'll serve their purpose. That's all I ask!

The gang in the good old days.

My design options. I opted out of painting because, you know, cardboard; so I dug these freaking adorable scrapbook papers out from my archives. I bought these back in Fall of 2011 for a dinner party I threw for the joy of the season.
It has actually come in really handy to have some scrap spooky paper around, as a side note/tip. Packets like the one I got (which came with all designs pictured) has proven time and again to be very versatile in use.

There were some scrap squares left from the dinner party, which is what I used because it was easy. I tabbed and taped the bottoms and folded them over like I did with the tape.

In the process of folding.

I gave each roll two different patterns just for funsies. Here is angle 1;

aaand angle 2.

Here is the magic behind this operation: baking soda, or air neutralizer!
I love my giant bag of baking soda.

Once filled, all these cuties needed were homes; so I wandered the apartment for a bit and found the most suitable nesting zones for them. The first place I went was the trash can in the kitchen, then to the cupboard above it. Hopefully, we'll start noticing a difference soon!

Another common stinky area: the bathroom.

Another bathroom hiding place, this one a little further from the shower and toilet.

Nestled in with the laundry stuffs...

Spot the Spook! Another kitchen "hiding" place.

Finally, I set the last one in an area of the apartment that is affected the most by everyone in the apartment, through either leaving or returning--the living room. This room doesn't typically get smelly unless victimized by the smells of another room; however it is the place we carry in the most stuff from the outside...so I thought it best to leave at least one in there.
Friday, February 5, 2016
Slayer
Hello, everyone! How is your Friday evening?
Every Thursday evening, I have a moment in which I realize I haven't even thought of which character to highlight for Attire Fridays, here at Widower's Way. I procrastinate with the best (or worst, depending on how you look at it). I've been incredibly lucky since this started, however, because it seems like there's always a new, fun, and interesting character at the surface of my psyche ready to volunteer the moment I ask.
Last night, Buffy was the name that echoed in the dark halls of my mind when I wondered who to cover today; so I'm gladly obliging! I freaking love Buffy!
For starters, her fashion sense may be a little outdated, now; but its hard lines, color blocks, and minimal jewelry really speaks to my soul. She dressed practically--to kick ass--and smartly--to bring the boys to the yard and all that.

I feel that the idea behind these outfits and the materials used for them was to balance the feminine and masculine qualities that Buffy balanced so well, herself.

For a super tough lady, Buffy could sure rock a miniskirt. All those ass-kicking muscles getting shown off!
Follow the link in the photo for a full list of various Buffy outfits!
Here is one Youtuber's rendition of the Buffy look. Super simple makeup and clothes you'll probably find at the back of your closet (you know, because they are kinda dated...):
Brought to you by MsDandelionDreamer!
And if you're wanting to actually do some ass kicking while dressed as Buffy, here's how to make your weapon:
Well, maybe not that one, but I enjoyed watching the process, at least.
Have a spooky, safe weekend! See you tomorrow!
STAY SPOOKY!!!
Every Thursday evening, I have a moment in which I realize I haven't even thought of which character to highlight for Attire Fridays, here at Widower's Way. I procrastinate with the best (or worst, depending on how you look at it). I've been incredibly lucky since this started, however, because it seems like there's always a new, fun, and interesting character at the surface of my psyche ready to volunteer the moment I ask.
Last night, Buffy was the name that echoed in the dark halls of my mind when I wondered who to cover today; so I'm gladly obliging! I freaking love Buffy!
For starters, her fashion sense may be a little outdated, now; but its hard lines, color blocks, and minimal jewelry really speaks to my soul. She dressed practically--to kick ass--and smartly--to bring the boys to the yard and all that.
I feel that the idea behind these outfits and the materials used for them was to balance the feminine and masculine qualities that Buffy balanced so well, herself.
For a super tough lady, Buffy could sure rock a miniskirt. All those ass-kicking muscles getting shown off!
Follow the link in the photo for a full list of various Buffy outfits!
Here is one Youtuber's rendition of the Buffy look. Super simple makeup and clothes you'll probably find at the back of your closet (you know, because they are kinda dated...):
Brought to you by MsDandelionDreamer!
And if you're wanting to actually do some ass kicking while dressed as Buffy, here's how to make your weapon:
Well, maybe not that one, but I enjoyed watching the process, at least.
Have a spooky, safe weekend! See you tomorrow!
STAY SPOOKY!!!
Wednesday, February 3, 2016
DIY Tuesday: Glass Luminaries, Part II
Greetings, Spooklings!
I know it looks like I've been slacking off, lately; but I've been busy starting a new gig and fighting off an infection. Between those two, it's been tough to make time for fun, unfortunately.
However, I did finally get around to painting some glass luminaries! I admit, I wasn't able to get to them all, but that's only because I'm trying to take my time and make them really nice. So, tonight, I'll be featuring two finished luminaries, and then I'll add in photos of the other two as they're finished (announcements on social media will be made at such times).
As you probably saw last week, I cut some old Starbucks bottles near the bottom to make them into luminaries. This week, I started them off with a brief cleaning, then gave them very watered down coats of my chosen colors (because it's all I have, I used acrylics) on the inside of the bottles. Before painting, I pre-folded some paper towels so I could let the bottles drip dry after being painted. This created a nice, even coat once dry, making it look like stained glass.


I know it looks like I've been slacking off, lately; but I've been busy starting a new gig and fighting off an infection. Between those two, it's been tough to make time for fun, unfortunately.
However, I did finally get around to painting some glass luminaries! I admit, I wasn't able to get to them all, but that's only because I'm trying to take my time and make them really nice. So, tonight, I'll be featuring two finished luminaries, and then I'll add in photos of the other two as they're finished (announcements on social media will be made at such times).
As you probably saw last week, I cut some old Starbucks bottles near the bottom to make them into luminaries. This week, I started them off with a brief cleaning, then gave them very watered down coats of my chosen colors (because it's all I have, I used acrylics) on the inside of the bottles. Before painting, I pre-folded some paper towels so I could let the bottles drip dry after being painted. This created a nice, even coat once dry, making it look like stained glass.
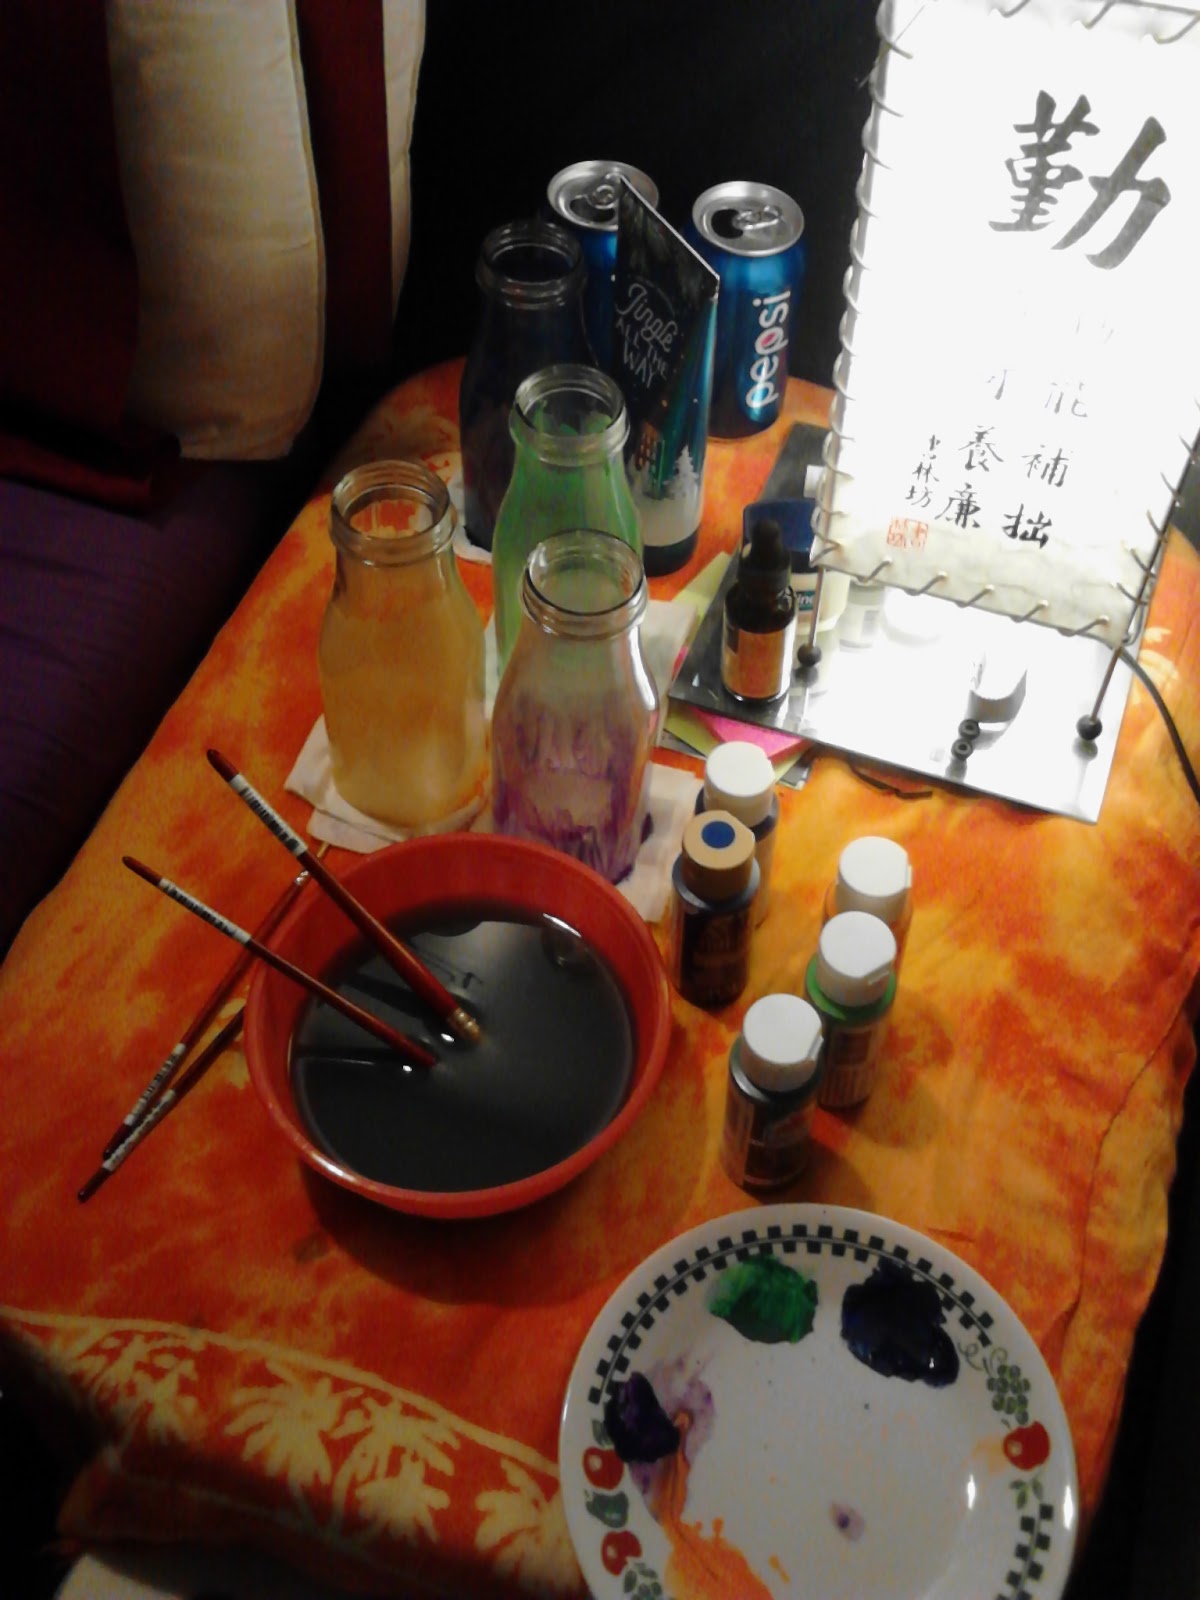
All the bottles freshly painted internally and dripping dry.

I wasn't really sure what I was doing design-wise while choosing colors for the bottles, so I just went for colors I generally decorate with and hopped on Pinterest to gather inspiration.

Pretty bottles in the daylight! I layered the purple on a little differently, as it didn't show up very well on a sheer coat like the rest. I'm hoping to come up with a good design to work with the pattern I created.

Inner view and a closer look at the dried finish.

This is after about six hours of playing around with paint in my room. It was 1am. I was tired.

Close-ups of the (maybe) finished touches. I enjoy dotwork!

I wanted to make this one look like an old, rusty lamp one would find in an abandoned factory. It ended up very Steampunky instead, which I'm not terribly upset about...


...I mentioned a few weeks ago that I'm (slightly) obsessed with stars. Welp, here ya go.

I started getting Don McLean's Vincent stuck in my head while painting this, so I've decided this is inspired by Van Gogh. I love him.


It's hard to tell, but the blue paint is oddly transparent. I'm really excited to see both of these with lights in them...once I buy the lights!

Two down, and two to go! As mentioned above, I'll post finished photos of these guys as I finish them! Thank you for joining me on this artsy fartsy adventure!
Have a vunderful evening.
STAY SPOOKY!!!
Friday, January 29, 2016
Beetlejuice Beetlejuice Beetlejuice!
Greetings, dear spooky people.
Last week, I shared with you some sweet costume ideas for Lydia Deetz of Beetlejuice; and I've been enjoying keeping with female/male themes biweekly...so--you guessed it-- tonight, I am covering The Juice himself! He's such a fun character to be for a night, as he loves to party! However, as a side note, please do remember to be a respectful Beetlejuice unless you want to lose friends. He can be a dick.
Anyway! I strangely had a hard time finding tutorials on how to make that infamous striped suit; so I will do my best to give ideas and inspiration!

This cosplayer did an incredible job at getting that Juicey essence we all love so much. Check out the link in the photo to see more of his Beetlejuice look, as well as his Edward Scissorhands creation!

Based purely on observation, my best educational guess on how to create this look is to stroll on down to your local thrift store and find an old, beat-up suit in either black or white.
At this juncture, you could take a few different routes. Personally, I would get out my acrylics and paint the stripes on; however I'm sure duct tape would work great for a quick fix! I choose acrylics because they tend to leave a more distressed look to the cloth once everything's dry; however, duct tape provides removability (in case you're planning a Slender Man cosplay next time around) and nice, clean lines.
Throw on a white shirt, black tie, and black combat boots, and you've got it!
IT'S SHOWTIME!
See you all tomorrow, and...
STAY SPOOKY!
Last week, I shared with you some sweet costume ideas for Lydia Deetz of Beetlejuice; and I've been enjoying keeping with female/male themes biweekly...so--you guessed it-- tonight, I am covering The Juice himself! He's such a fun character to be for a night, as he loves to party! However, as a side note, please do remember to be a respectful Beetlejuice unless you want to lose friends. He can be a dick.
Anyway! I strangely had a hard time finding tutorials on how to make that infamous striped suit; so I will do my best to give ideas and inspiration!
This cosplayer did an incredible job at getting that Juicey essence we all love so much. Check out the link in the photo to see more of his Beetlejuice look, as well as his Edward Scissorhands creation!
Based purely on observation, my best educational guess on how to create this look is to stroll on down to your local thrift store and find an old, beat-up suit in either black or white.
At this juncture, you could take a few different routes. Personally, I would get out my acrylics and paint the stripes on; however I'm sure duct tape would work great for a quick fix! I choose acrylics because they tend to leave a more distressed look to the cloth once everything's dry; however, duct tape provides removability (in case you're planning a Slender Man cosplay next time around) and nice, clean lines.
Throw on a white shirt, black tie, and black combat boots, and you've got it!
IT'S SHOWTIME!
See you all tomorrow, and...
STAY SPOOKY!
Wednesday, January 27, 2016
Igor's Hump: Discovering
Good evening, Spooklings!
I've been scrolling on facebook, today, and found a couple of interesting bits of information to entertain on a (possibly) drab Wednesday.
First thing I found was a new product on the horror market! The artwork on these new monster mugs is incredibly skilled and satisfyingly gory. If they weren't so expensive, they would be pretty awesome for that first morning brew--maybe even provide a startle to get your heart pumping before the caffeine--but, due to that price, I would store that guy on a shelf and use him as decor! Check out the link for photos and details on these creepy mugs!
Apparently, there are rumors flying around about the next dark theme of the tv series, American Horror Story. I love to watch where they go creatively, as it's typically right where I'd hoped, even if I didn't realize it until I saw it. Slender Man-inspired antics should make for an interesting and pants-crapping experience. I think I'm in, even if Gaga comes back for this season.

While falling down one youtube rabbit hole or another, I found the following video, which documents the innards of a recently unlocked turn-of-the-century French mansion. It's completely pure to the time in which its doors were locked, which makes it really fun to study and imagine what life was like. It's pretty spooky to me:
Enjoy the downward slope to Friday, everyone! Thanks for joining me tonight.
STAY SPOOKY!
I've been scrolling on facebook, today, and found a couple of interesting bits of information to entertain on a (possibly) drab Wednesday.
First thing I found was a new product on the horror market! The artwork on these new monster mugs is incredibly skilled and satisfyingly gory. If they weren't so expensive, they would be pretty awesome for that first morning brew--maybe even provide a startle to get your heart pumping before the caffeine--but, due to that price, I would store that guy on a shelf and use him as decor! Check out the link for photos and details on these creepy mugs!
Apparently, there are rumors flying around about the next dark theme of the tv series, American Horror Story. I love to watch where they go creatively, as it's typically right where I'd hoped, even if I didn't realize it until I saw it. Slender Man-inspired antics should make for an interesting and pants-crapping experience. I think I'm in, even if Gaga comes back for this season.
While falling down one youtube rabbit hole or another, I found the following video, which documents the innards of a recently unlocked turn-of-the-century French mansion. It's completely pure to the time in which its doors were locked, which makes it really fun to study and imagine what life was like. It's pretty spooky to me:
Enjoy the downward slope to Friday, everyone! Thanks for joining me tonight.
STAY SPOOKY!
Tuesday, January 26, 2016
DIY Tuesday: Glass Luminaries
Hello, and welcome to DIY Tuesdays!
Today's post will have two parts because, unfortunately, I'm not feeling well tonight and can't muster the energy to paint anything. Luckily, I already have some of the work done, though! Let me show you:
I have a really hard time throwing away glass bottles; so when I had a job that required coffee on the regular, I started a bit of a collection of Starbucks bottles. I love the versatility of their shape: I'm using them in this project as a type of luminary/hanging light thingy, but I also use one in the shower to hold my apple cider vinegar face wash concoction. They've definitely been great to have on hand!


Today's post will have two parts because, unfortunately, I'm not feeling well tonight and can't muster the energy to paint anything. Luckily, I already have some of the work done, though! Let me show you:
I have a really hard time throwing away glass bottles; so when I had a job that required coffee on the regular, I started a bit of a collection of Starbucks bottles. I love the versatility of their shape: I'm using them in this project as a type of luminary/hanging light thingy, but I also use one in the shower to hold my apple cider vinegar face wash concoction. They've definitely been great to have on hand!

I'm pretty lucky because my boyfriend works at a glass shop, so we had access to loud whirring things that cut right through them in seconds--a wet saw or something like that; glass needs water to cut. Most people don't have one of those just laying around, though; so I found a simple tutorial for you to follow, if interested.

I asked him to cut just below the label so that I would have plenty of space on which to paint. The saw gave them a pretty clean cut, initially.

Mounted and ready to be cut.

T doing the heavy work. Don't trust me around big blades.

Here are the bottles and their bottoms, probably feeling a little disoriented. I would be too if I was suddenly sitting next to my ass.

T grinding the edges down so we don't cut ourselves while working with them.

Finally, we peeled the labels off (it's pretty easy on these bottles), and used some heavy duty grime remover to lose the last of the sticker yuck. After a rinse, I left them out to dry and haven't touched them since.
Until next week, friends! This adventure shall continue with some cute paint jobs, and then I'll figure out how to rig a light on them! I'm pretty excited about it...but, for now, I'm going to go lay down.
Have a creepy night! STAY SPOOKY!!!
Subscribe to:
Posts (Atom)